Thursday, September 30, 2010

How about some Christmas Cuteness...

I made something...Something FABULOUS...or so I think anyway...we'll see what ya'll think...so straight to the picture...


So what do you think? Is it just alright, cute, super cute, or FABULOUS...I think it is up in the super cute category, but I may be a bit partial as I made it...so let me know what you think...

I just can't believe that I actually got out my sewing machine and SEWED...yes...it was just a straight stitch...but I still SEWED...so be proud of me Momma...YAY...I sewed...I even SEWED on the buttons...I sure did...so leave me a comment and let me know how ya'll like my little tree...

I am also linking this up to the SoShelli challenge this month which was FABRIC...

Happy Stampin'
Twila

Wednesday, September 29, 2010

Just a quick one...

I stamped...YAY...FINALLY...I didn't do much, but I did get THIS card finished...and hopefully I will get more stamping done today...along with EVERYTHING else that needs to be taken care of today...WOW...what a TO DO list I have...at least it isn't a TO DO BEFORE list...but it IS long...so I will just post a short one today...


Just a quick peek at this manly birthday card...It is a really simple one...just a 4x4 square of DSP and some watercoloring...okay a lot of watercoloring...but watercoloring is the easy part...just the layering of colors...OKAY off to work on my TO DO list...Have a great day...

Happy Stampin'
Twila

Tuesday, September 28, 2010

Taught another class...

I taught another class yesterday at my Local Scrapbook store...It was a lot of fun...I met some really fun ladies...and hope to spend more time with them as they sign up for other classes at the store. BUT...it is leaving me less time to stamp...I am going to have to fix that issue...as I am having to figure out every morning now...WHAT AM I GOING TO POST TODAY...usually I have a good supply of cards and photos...but over the last couple of weeks...I have used them all...so my plan this weekend...since as of now I don't have to work...Is to pull out my Stampin' Up! stamps and just play...along with designing a few cards for some upcoming card kits and some other classes that I might be offering soon...I have plans I tell ya...just executing them...that seems to be my issue...so hopefully it will all come together and I will get it accomplished...now onto what you come here to see...

Something I have ASSEMBLED...yep...how is that for something quick and easy...no stamping needed! This is the Candy Countdown Calendar Kit from the Holiday Mini and it is TOO CUTE...it is only $19.95 for 25 boxes that are really EASY to assemble and ADORABLE once you get them decorated...this kit comes with everything you need...pre-cut and all you have to do is put it together...I hung it from the wall of bookcases that line our living room...there are 5 bookcases from Ikea lined up and I had to put support in the middle as it hung so low...it is show in the Mini hung in several rows...which is another options...but I liked it strung across the living room...


Here is a closer look at a single box...ignore what is SHOVED onto the shelves in the background...that is one of the things that we haven't gotten to since we've moved...straightening out and organizing the movies / book shelves...everything that was on there at the other house...is on there now...just on a shelf somewhere...not put up where it belongs so it's pretty...SORRY...


Okay...I am off to a Design Team meeting at the store...we are planning some of our Christmas release today...

Happy Stampin'
Twila

Monday, September 27, 2010

Workshop in a Box...

My friend Kerry lives in CA and we of course now live in TX...she wanted to have a workshop, so she could get together with her friends for a FUN night out and earn some FREE Stampin' Up! products...so I sent her... A WORKSHOP IN A BOX...

WHAT is a WORKSHOP IN A BOX...you ask?...a WORKSHOP IN A BOX is a a workshop where I design a couple of projects based on the stamps and inks that YOU have and MAIL the projects to you along with step-by-step instructions for the projects, I also send the catalog, mini catalog, invitations, order forms, etc...you invite your friends over to make the cards, they look at the catalog and mini...and guests fill out their order forms and then we do everything to close the workshop over the phone or the computer, I ALWAYS put the Workshops on my calendar and I am ALWAYS available, so if there are questions...I am just a quick phone call away...

So if you don't "HAPPEN" to live locally and still want to have a WORKSHOP and EARN Stampin' Up! products for FREE just let me know as I would LOVE to design a couple of cards specifically for you and your friends to make and get YOUR WORKSHOP IN A BOX kit into the mail to you ASAP...

Here are the cards from Kerry's Workshop in a Box...she requested a Fall / Thanksgiving card and the Day of Gratitude stamp set we received at the Ft. Worth Regional earlier this month fit the bill...It was a set that Kerry didn't have, but since I knew that putting ink to paper was the easiest thing to do and learn they received the Medallion and sentiment already pre-stamped for them...

She also requested a Christmas card, who wouldn't want to get started early on making those...I know I would LOVE to...but it NEVER seems to happen...I am always sending them out in the middle of December...This one is simple and easy to recreate, just requires a bit of water coloring...and I LOVE the Candy Cane Designer Series Paper...who can resist glitter...not me...too much sparkly goodness...


Well...I hope that you have enjoyed seeing what I sent to Kerry for her Workshop In a Box...please let me know if you are interested in hosting one of your own...all you have to do is send me an e-mail or leave me a comment...and I will get in contact with you...for your consultation...and we can get one designed JUST FOR YOU!

Happy Stampin'
Twila

Friday, September 24, 2010

Halloween Card Kit...

I am going to TRY something new…so bear with me as I get the kinks worked out…I am starting a Kit…I will hopefully be doing it every few weeks…the first one will be for Halloween…there are 3 Options available…I prefer PayPal for payment…as it will just be easier…you can just send me the money through PayPal or you can have me request it from you either way is fine…

I will be taking orders for this KIT from TODAY…THROUGH…OCT 1st…on Oct 2nd I will e-mail ALL Option #1 orders their instructions, Those that Order Option #2 and Option #3, I will place the necessary orders and have the all supplies shipped to me and it will take me a couple of days once they arrive to kit everything…I have most consumables already so all of those items will be ready to go…I will have all KITS MAILED OUT BY Monday Oct 11th…if not sooner…

For those that want Option #2 or Option #3, if there are any EXTRA supplies that you need OR want please let me know so I can adjust your amount owed and I can get those extra supplies ordered for you…I will be mailing everything to you in a flat rate box…so the shipping will be the same, no matter how much is in it…and that is ALREADY included in the cost of the kits...so it is like getting the extra shipping FOR FREE.


Option #1 $3.00

Card Step-By-Step Instructions ONLY

Option#2 $10.00

Card Instructions plus all consumable supplies to make cards. This includes Cardstock, Ribbon, Designer Series Paper, Rhinestones, Pearls, Brads, Eyelets, etc. (This does NOT include Stampin’ Dimensionals or any kind of adhesive) All supplies will be cut and kit per card with step-by-step instructions and mailed to you. No stamps, inks or wheels are provided with this option.**

Option #3 $65.00

Card Instructions plus all consumable supplies to make cards. This includes Cardstock, Ribbon, Designer Series Paper, Rhinestones, Pearls, Brads, Eyelets, etc. (This does NOT include Stampin’ Dimensionals or any kind of adhesive) All supplies will be cut and kit per card with step-by-step instructions and mailed to you, NO INK is provided.** This option INCLUDES the From the Crypt Stamp Set $22.95, Web Wheel $6.50, Basic Rhinestones $4.95, Basic Black Grosgrain Ribbon $6.95.

**Please let me know if you need any additional supplies, I will gladly order them for you and ship them to you in your kit…See Supply List

SUPPLY LIST

STAMPS: From the Crypt Stamp Set, All Holidays Stamp Set

CARDSTOCK: Basic Gray, Glossy White, Old Olive, Basic Black, Whisper White

INKS: Old Olive Ink Pad, Staz-On – Jet Black Ink Pad, Basic Gray Ink Pad

ACCESSORIES: Neutrals – Designer Series Paper, Big Shot, Spider Web Embossing Folder, Sanding Block, Modern Label Punch, Word Window Punch, Decorative Label Punch Basic , Wide Oval Punch, 1/8” Handheld Punch, Rhinestones, Raven ½” Lace Trim, 5/8” Basic Black Grosgrain Ribbon, Stampin’ Dimensionals, SNAIL Adhesive, Web Wheel, Small Wheel Handle, White String, Stampin’ Sponges, Basic Black Marker


Please let me know what you think…and which Option of Card kit you would like to order…If you have ANY questions about how all this works…please contact me…

Happy Stamping...
Twila

Thursday, September 23, 2010

I've got nothing for you...

I've got nothing for you today except a headache...anyone want that...PLEASE...I will gladly give that away for FREE to the first person who wants it...I have run out of things to show you...My plan was to come home last night and finish up my Halloween Kit class and get that up to show you guys so that you could start ordering it..l.but that didn't happen because of this stupid headache that WON'T go away...and today I have to go and teach at the scrapbook store...from 9-2...so hopefully my meds will kick in and I will feel better soon and when I get home this afternoon I can get that finished up and posted tomorrow morning...

In other news...the VOTES are still coming in and I am still in the lead...RIBBON...7...MOMMA...0...Sorry Momma...it's not gaudy...it gives it a bit more vintage charm...so I WIN!

Okay...so I gotta go...check back tomorrow...I PROMISE the Halloween Class Kit will be posted...

Happy Stampin'
Twila

Wednesday, September 22, 2010

Welcome...

THANK YOU to the TWO people who left comments and voted yesterday...The results of the poll are in....and the ribbon WINS...YAY...I knew I was right...Momma still disagrees and stills says that me adding the ribbon is gaudy...you see she looks at my blog too...but she didn't vote...she could have...but she didn't...so her vote didn't count...her opinion over the phone...doesn't mean a thing,..the RIBBON WON...now onto what you come here to see...PROJECTS...

I made this one a few weeks ago for my Open House...I had been wanted to make a WELCOME banner for a while...I just never had...so it was time...I have this weird nook thing here in this house as you leave the entry way and come into what would be the "formal" dining room...here in the Mooneyham household...it's the Studio...so it is where a LOT of Crafty Goodness goes when I get'er done so it can be shown off to...hold up there...yep...I remember...got no friends at the moment to show stuff off to...that is one reason I post stuff so often here...ya'll are suppose to ewwww and aaahhhh over all of my stuff...anyway...that little nook is where I place stuff until I can get photos taken of it for ya'll to gawk over...This banner has been up there since before the Open House and there it will stay...as I LOVE IT!...


Closer look at the pennants


Closer look at the letters...I used Crystal Effects and the Black Chunky Glitter on the letters...Sparkly!


These hand down from each end of the banner...there are flowers on each pennant and one on each end...I really wanted top frame the nook...


Now stay tuned as I am planning a kit class that will be posted hopefully tomorrow...it is something new that I am going to be trying...now I just need to finish designing the class...

Happy Stampin'
Twila

Tuesday, September 21, 2010

Take a vote...

Take a vote...Here is the bracelet that I went with my Momma to make this last weekend at her local scrapbook store...as I said before we had a really good time...I came home and added lace ribbon...but before I did...I took pictures as Momma said that it was gonna be gaudy...so I want opinions...

BEFORE: Without Ribbon...


AFTER: With Ribbon...


Yes...it's the same bracelet...just different times of day...leads to the different lighting...So...I would like your opinions...which do you like better...WITH or WITHOUT ribbon...

LET THE VOTING BEGIN...

Happy Stampin'
Twila

Monday, September 20, 2010

How about a trip to Paris...

How about a trip to Paris or at least I'll show you a stamp of the Eiffel Tower...sorry I didn't post over the weekend...it is kinda becoming a habit...I take a bit of a blogging break to make more stuff and do other things...take this weekend...

Saturday...I met Momma in Denton, TX and we did a bit of crafty shopping at Hobby Lobby, Michaels, Big Lots, and the Dollar Store...I got there early and stopped at Wal-Mart first and then we were off to her local scrapbook store for a class...I haven't signed up to take a class anywhere in a long time as I am usually the one teaching...but it was a TON of fun...a class where I didn't have to do anything but make the project...no prep work, no teaching, no clean-up...it was really nice...I'll show you what we made tomorrow as I want to add a bit of ribbon to it...Momma thinks it will look gaudy...but I think it will finish it off just right...

Sunday...I started out by making breakfast for my family, then followed that up by taking a well deserved nap...then I got up and started a roast for dinner. By that time it was noon and the Cowboys game was on so I sat down with my hubby to watch that...THEN...the kids and I got into the garage and cleaned and rearranged that...so now I know where all my stuff is at...and I found all of my retired SU! stuff...now to get rid of it all...then SHOWER TIME as after the garage we were all hot and stinky...dinner came next...boy was it tasty...even got some furniture moved around after that...it was a productive day...ANYWAY...back to the Eiffel Tower...

Here she is...Paris in all her glory...not really, just the Eiffel Tower...she's just a card...a cute one at that...have ya'll noticed a trend in my cards for the last few posts...HUH...yes...no...maybe so...take a close look...


Let me give you a bit of a hint...on the last three cards...I have used Crumb Cake cardstock cut to 4 1/4" x 11, the same piece of Deck the Halls DSP cut to 4" x 4", and the same inkpads...Staz-On - Jet Black, Cherry Cobbler and Crumb Cake....I have just used different stamps and embellishments on each card to make the cards unique...so you see...proof again that you don't NEED a ton of supplies to stamp...we just happen to WANT IT ALL...

CARD DETAILS:

STAMPS: Artistic Etchings
CARDSTOCK: Crumb Cake, Very Vanilla
INKS: Staz-On - Jet black, Cherry Cobbler, Crumb Cake
ACCESSORIES: Stampi' Dimensionals, 1 1/4" Striped Grosgrain Ribbon- Basic Black

Well...I hope everyone had a great weekend...I know mine was...now off to do things on my TO DO list...you know I make a new one EVERY night before I go to bed...I can be a bit OCD about certain things...now I can check...Update Blog off of my list...

Friday, September 17, 2010

That cute little ornament

That cute little ornament from the holiday mini set Tags til Christmas...who DOESN'T love that set...every stamp in there has a matching punch...no scissors required...now that is my kind of stamp set! This is a super simple card that I made for my Open house...remember the one that no one showed up to...yeah...that one...do you see what they missed out on...CUTENESS!


Yes...I kept it super simple as I was HOPING to get some new stampers at my event...and we all know how that turned out...so I am not going to go on about it...

Here are the card details:

STAMPS: Tags til Christmas
CARDSTOCK: Pink Pirouette (4 /14" x 11"), Whisper White (3" x 3")
INKS: Real Red
ACCESSORIES: Candy Cane DSP (4" x 4"), 5/8" - Whisper White Grosgrain Ribbon - 16", 1/8" Whisper White Grosgrain Ribbon - 12", Basic Rhinestones

It doesn't get much simpler than that...very quick...very easy...now I am off to work on my TO DO list for today...

Lots TO DO before 10 am when I have to be headed to my local Scrapbook store for their Fall / Halloween Kick-Off event...did I tell ya'll I am going to be teaching classes there? YEP...every other Monday starting on Sept 27th...if you want more info let me know...as I have to keep my blog all SU! and the stuff at the Scrapbook store as we all know IS NOT...that's okay though...I do this wonderful hobby as a way to meet great new friends and I know this opportunity will open that door...

Happy Stampin'
Twila

Thursday, September 16, 2010

Yep...Another Christmas Card...

Here is another one for you...another CUTE Christmas Card...This one uses the Holiday Hoopla Stamp Set again...I really like this set as it is pretty versatile...but it is mainly because that Santa is SUPER CUTE...I didn't use him this time, but I did use the part of his hat and made that into the Christmas Tree...Here is the card...


CARD DETAILS:

STAMPS: Holiday Hoopla, Christmas Collage, Wonderfully Worn, Many Merry Messages
CARDSTOCK: Crumb Cake (4 1/4" x 11', Scrap x 2 ), Confetti White ( 1" x 5 1/2", Scrap)
INKS: Always Artichoke, Cherry Cobbler, Soft Suede, Crumb Cake, Staz-On - Jet Black
ACCESSORIES: Seam Binding - Always Artichoke, Stampin' Dimensionals, 1 1/4" Square Punch, Deck the Halls DSP (4" x 4"), Designer Buttons - Neutrals, Linen Thread, 1 3/4" Circle Punch, Stampin' Sponges

It's REALLY hard to see in the photo but I used the Christmas Collage background stamp on the card in Crumb Cake ink on the Crumb Cake Cardstock...I really like how this vintage looking card turned out...Let me know if you do to...

Happy Stampin'
Twila

Wednesday, September 15, 2010

Christmas comes early...

Christmas comes early in the crafting world as we get ready for the up coming Holiday season...Here is a card that I created using the Holiday Hoopla stamp set...Love that Santa...and a bit of the Smooth Illuminating Top Coat...OKAY...I used more than a bit...but that stuff is addicting...it is sparkle in a bottle...Glitter without the mess...I'm telling you if you don't have it...GET IT...If you don't have a way to order it...contact me and I will get it ordered for you ASAP...IT'S MAGIC in a bottle...I PROMISE...

Now...Back to the card...Cute Huh!


And Here's is a close-up of Santa...if you look closely...you can see the sparkle and shimmer from the Smooch...it's SO PRETTY...


CARD DETAILS:

STAMPS: Holiday Hoolpa, Many Merry Messages
CARDSTOCK: Crumb Cake (4 1/4" x 11"), Whisper White ( 2 1/2" x 3 1/2", 5/8" 4 1/4")
INKS: Staz-On - Jet Black, Whisper White, Cherry Cobbler
ACCESSORIES: Blush Blossom Marker, Deck the Halls DSP (4" x 4"), Seam Binding - Always Artichoke - 18", Smooch Illuminating Top Coat (Magic Sparkle in a Bottle), 3/4" Square Punch

Hope you liked my Christmas sneak peek...I have a few more to share with you soon...

Happy Stampin'
Twila

Tuesday, September 14, 2010

9-14-2010 - THE NECKLACE...

I think I got just as many comments on my necklace at Regional as my presentation...I was asked over and over how I did it...So let me tell you really quickly...cause it wasn't hard...I don't do hard...

OH...Here are a couple of photos of it for those of you who haven't seen it yet...


Seriously...it is SUPER SIMPLE...it only takes about 15 to 20 minutes of actual work time...Here is what you do...

Step 1...Cut out your Butterfly

Step 2...Stamp and Color your Butterfly shape

Step 3...Cover the ENTIRE Butterfly with a coat of Crystal Effects

Step 4...While Crystal Effects are still wet...Sprinkle with CLEAR Chunky Glitter

Step 5...Go to bed...I made mine late at night and then went to bed...

Step 6...Get Up...When your Butterfly is dry add the LARGE Basic Rhinestones

Step 7...Get out your glue gun and add a pin to the back...It was that easy...

My necklace was made to have pins and brooches hung from it...you can also do this same thing with our Simply Adorned Line of necklaces...

Let me know if you make a Sparkly necklace or pin for yourself...I would love to see them...


Happy Stampin'
Twila

Monday, September 13, 2010

9-13-2010

This is gonna be a LONG one so bear with me...This post is all about the samples from the Ft. Worth Regional event that was held this weekend...I was SO excited to learn at Convention that there was going to be a Regional RIGHT HERE...where we HAD JUST MOVED TO...20 MINUTES DOWN THE STREET! So...I made plans to attend...clicked my mouse as SOON as Registration was allowed and I sent off my paperwork to be a Make'n'Take Helper...

I got an e-mail asking if I was interested in being on stage as a Workshop WoW Presenter to please submit an idea...so of course I did that...and I was LUCKY enough to get a fantastic phone call from Mark Jessen from SU! letting me know that I had been chosen...YIPPEE...I get to by a new outfit, get my nails done...it was a GREAT Stampin' Up! day...then a couple of days later...I got another call from SU!...I had gotten chosen to be a Make'n'Take Helper...it was my Stampin' Up! week...I was OVER THE MOON...but then my hopes were dashed as I had to choose...I couldn't do both at the same event...now I know I was meant to be onstage, in lights and in front of the camera...so of course that is what I chose...my 5 minutes of fame... SU! gave me 5 minutes of fame...BUT and I know I went over that...I talk a lot...it was HARD to squeeze talking and stampin and show-n-tell ALL into a measly 5 little minutes...

Here is the a little bit of what my presentation was about...

How many of us make $300.00 cards....I know I am guilty of it...I do it ALL the time...but until you add up EVERYTHING you used to make that card...you don't really realize how much it costs...and sometimes for your new customers and newer stampers who want to make cards...JUST LIKE YOURS...it a bit out of their budget...Here is an example...


Cute card HUH...It looks pretty simple and straight forward...but when you add up everything that you need to buy if you are a new customer and have nothing to make this card it is $308.45...so I have come up with a technique that will appeal to new stampers and people who have been stamping a while...I call it Silhouette stamping...basically you take any image...and just use the Black Staz-On ink...for your stampers who have been stamping a while..you can step up the cards with Dimenionals, Ribbon, Smooch Illuminating Top Coat, Basic Pearls or Basic Rhinestones...Here are the cards that I made onstage...for the SIMPLE VERSIONS...Crumb Cake Cardstock, Staz-On - Jet Black Ink, Patterns DSP - Brights...for the Stepped-Up Versions I used Victoria Crochet Trim, Basic Pearls, the Modern Label Punch, Smooch Illuminating Top Coat and Stampin' Dimensionals...

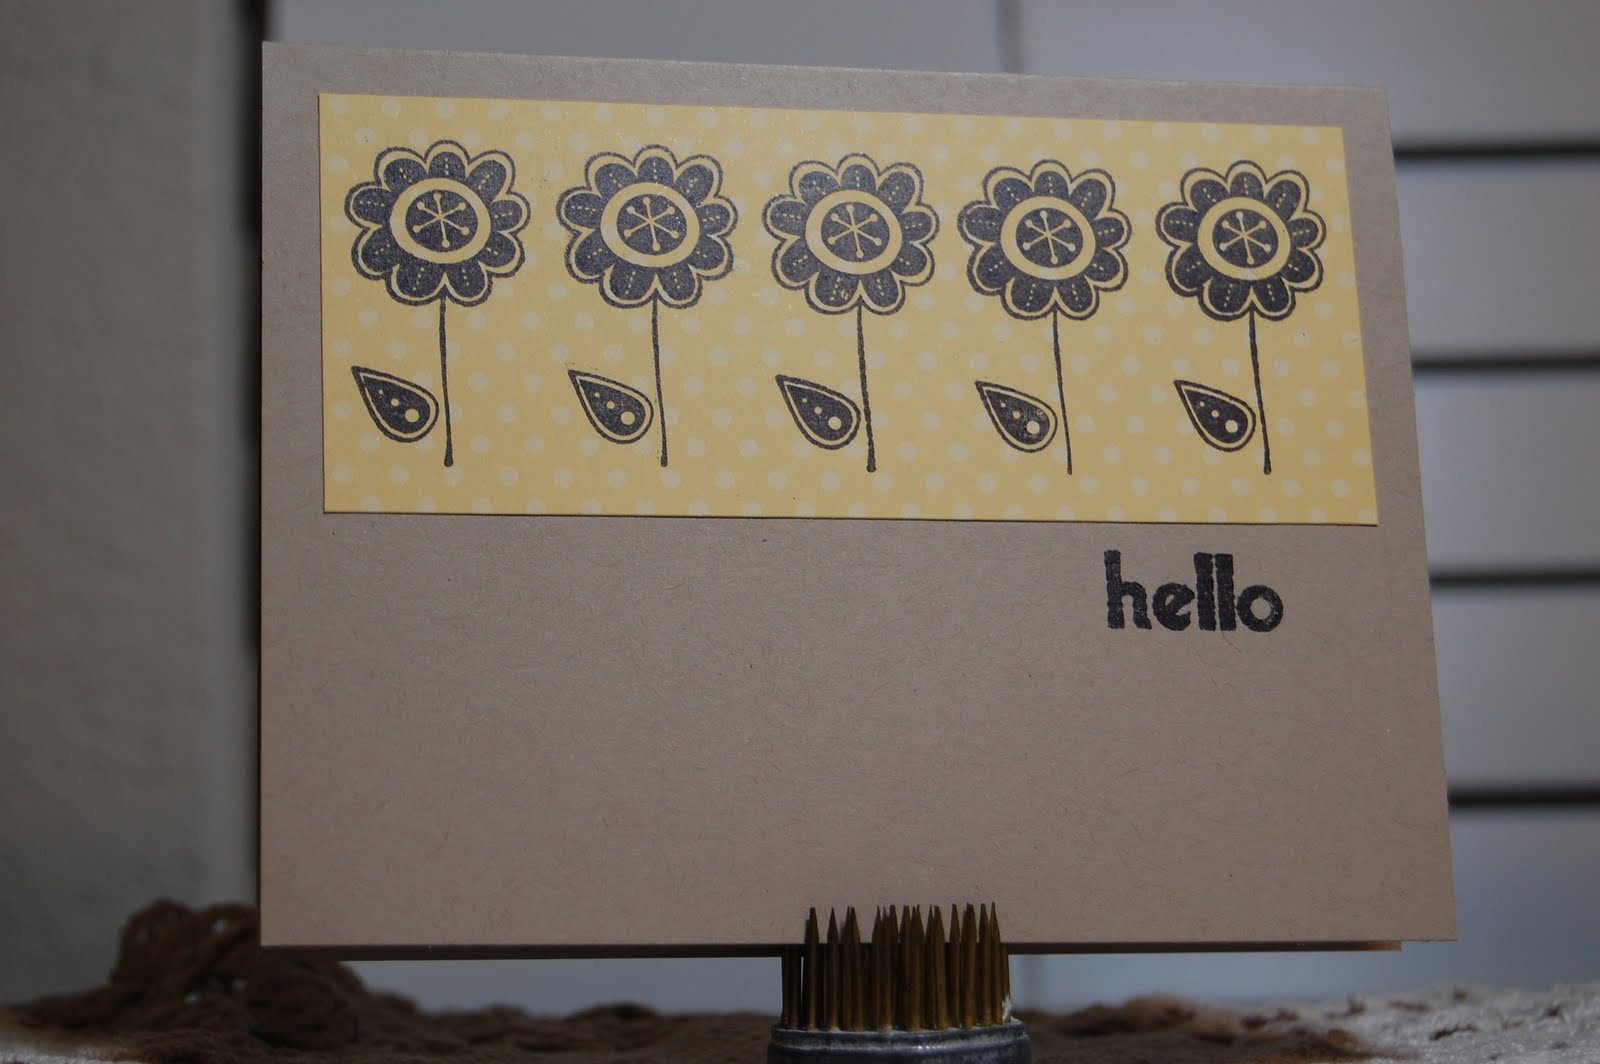
Here is the Simple Version...


and then the Stepped-Up Version...


Close-Up of card details...


Simple Version...


Stepped-Up Version...


Close-Up of Card Details...


Simple Version...


Stepped-Up Version...


Simple Version...


Stepped-Up Version...this was my FAVORITE card that I presented on stage...I LOVED the Modern Label Punch as the border...


Close-Up of Card details...see the Label Punch border...TOO CUTE...


This is the card that delayed the upload process...yep...I needed to leave SOMETHING with Stampin' Up! per their request and as I didn't get a chance to make two of everything like I normally do...well...I guess technically, I really did...just a simple version and a stepped up version...I had to come home and make another one of these beauties...so I quickly got that taken care of this morning...so I could get ALL of the cards loaded...here is the Simple Version...


Stepped-Up Version...


Close-Up of card details...


These are the projects that WERE NOT shown on stage...they were on display at the back of the room...I still only used for the SIMPLE VERSIONS...Crumb Cake Cardstock, Staz-On - Jet Black Ink, Patterns DSP - Brights...and then on the STEPPED-UP VERSIONS...I used Crumb Cake Cardstock, Staz-On - Jet Black Ink, Patterns DSP - Brights, a neutral ribbon, Basic Rhinestones OR Basic Pearls, a Punch, Smooch Illuminating Top Coat and Stampin' Dimensionals...

Simple Version...


Stepped-Up Version...This was my FAVORITE card that I made of the ones that I didn't show on stage...It is a really simple card, but with lots of bling and sparkle...

Close-Up of card details...


Simple Version...


Stepped-Up Version


Simple Version...


Stepped-Up...this one, I changed into a box...it took the same amount of cardstock and less DSP


Here is the inside of the little box...


Simple version...


Stepped-Up version


Simple Version

Stepped-Up version...


Close-Up of card details...


Scrapbooking...one of my favorite things to do, but I sometimes have a really hard time teaching this in a class or workshop as it is so personal...I have a hard time making pages without pictures...but this one is pretty generalized so it can be adapted to a lot of different photos and color schemes...Here is the Simple version...


Here is the Stepped-Up version...


This IS my favorite Stamp set...Extreme Elements...so I had to use it on SOMETHING...so I chose to use it on a scrapbook page about my youngest daughter Colleen...we have a running joke in our family about which kid is the "FAVORITE"...well...my journaling states "Colleen is my "favorite" kid...I keep her around 'cause she makes me laugh"...she always has something to say that is funny...and each kid is my "FAVORITE" anytime I have something that I want them to do or when they do something for me...They ask me WHY do I have to do it...I always answer...because...YOUR MY FAVORITE...

Here is the Simple Page...


Here is the stepped-up page and some Close-Up Photos...


Can't forget the bling and the smooch...LOVE the sparkle in a bottle...and it's mess free...


Just added a punch for a little bit of detail and a ruffle of ribbon...and of course some more bling...


WHEW...I think that is everything...I hope those of you who where at the Regional on Saturday enjoyed the day...i know I did...Come back tomorrow for photos and details of my necklace...I had a TON of comments and HOW DID YOU DO THAT questions...so I will answer those then as this post is ginormous...Please let me know if you have any questions about anything...I am more than happy to answer them...but I can't read your minds...


Happy Stampin'

Twila